Skip to main content
Toggle menu
Compare
Search
Sign in
or
Register
Cart
Search
Search
Shop All
Corten Steel Signs
All Corten Steel Signs
Corten Steel House Signs
Corten Steel House Numbers
Corten Steel House Name Signs
Corten Steel Business Signs
Single Layer Corten Signs
Double Layer Corten Signs
Projecting Signs
Toilet and other symbol signs
Stainless Steel Signs
All Stainless Steel Signs
Stainless Steel House Name Signs
Stainless Steel House Number Signs
Stainless Steel Business Signs
Lighting
All Lighting
Interior Design Lighting
Garden & Outdoor Lighting
Hospitality & Commercial Lighting
Other Products
All Other Products
Corten Steel Products
Corten Steel Lighting
Pet Signs & Memorials
Corten Steel Letters / Numbers / Symbols
Fixings
Stainless Steel Products
Stainless Steel Clipboards
Stainless Steel Lighting
Stainless Steel Golf Tags
Stainless Steel Labels
Useful Info
Contact Us
Sign in
or
Register
Home
Useful Info
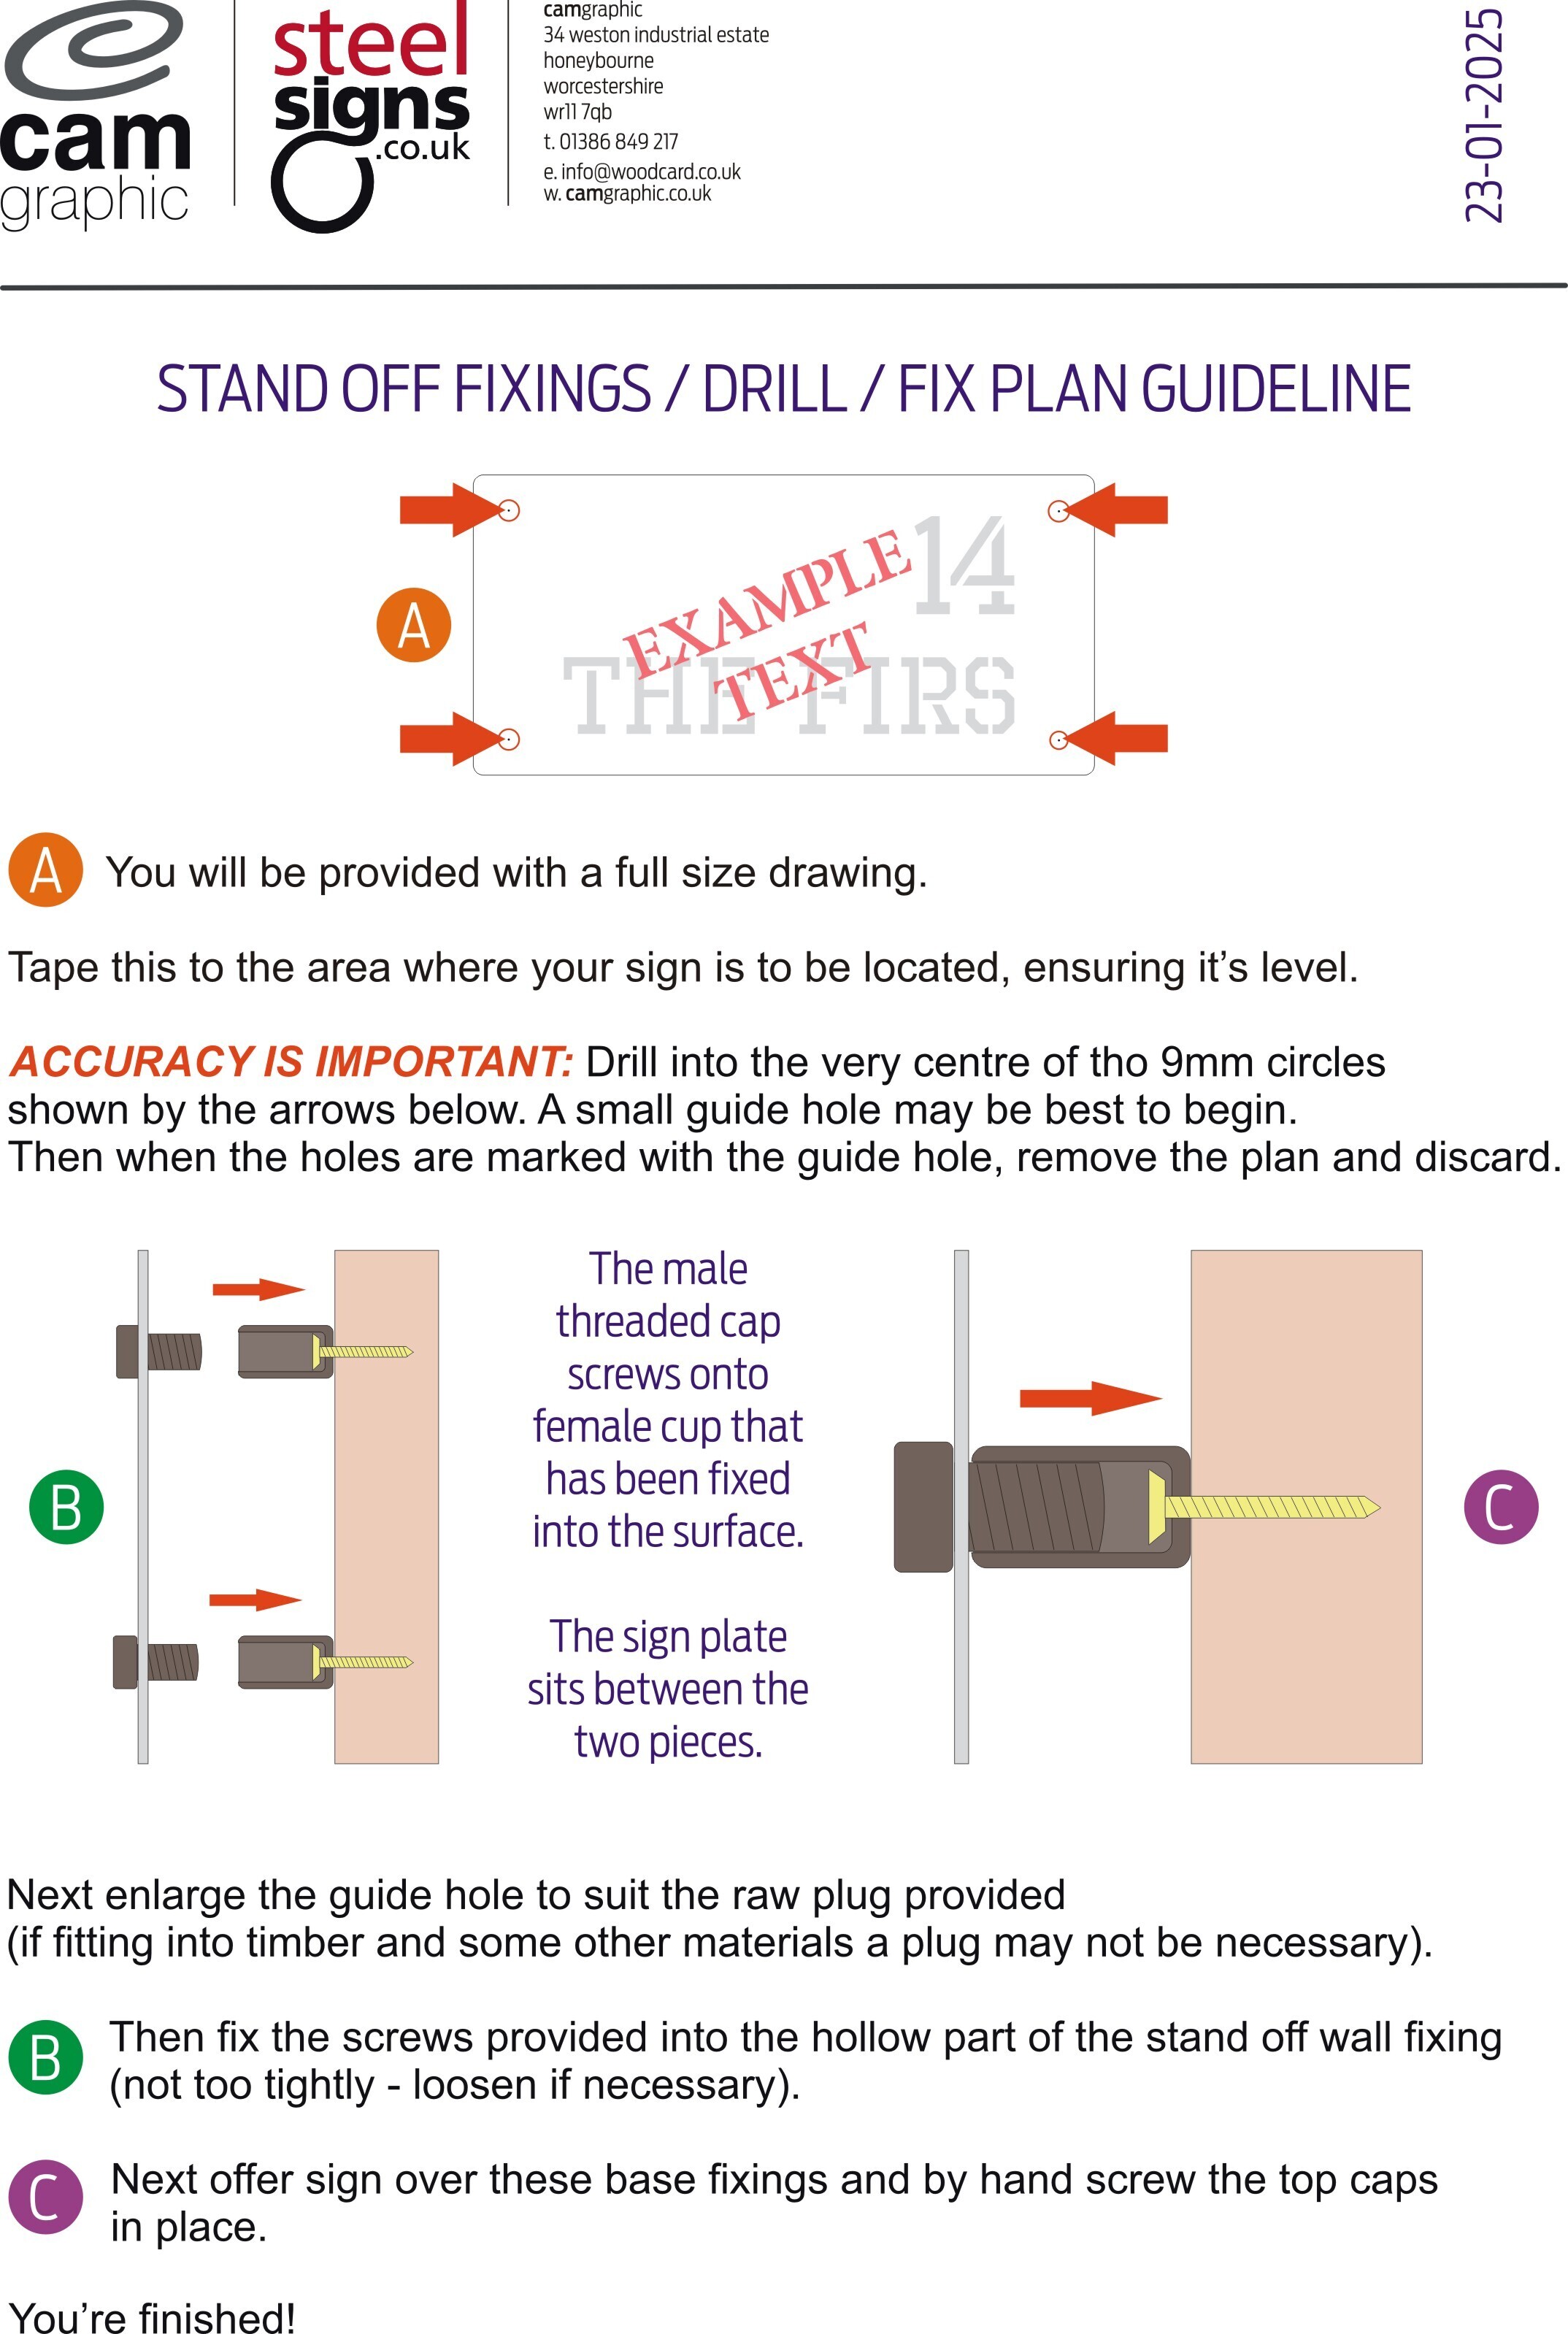
Stand Off Fixings - Explained
Stand Off Fixings - Explained
Close
×
!
OK
Cancel